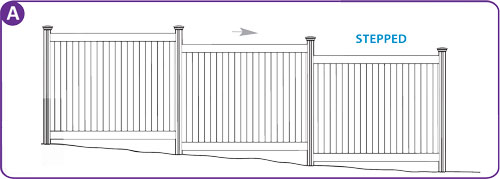
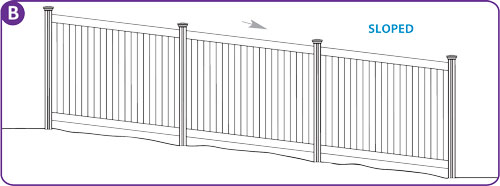
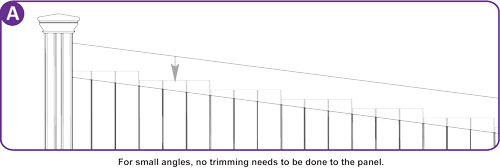
There are two ways to tackle a vinyl fence line with ground that slopes either up or down. You can step or slope your vinyl fence as illustrated below. Because no other man-made vertical element in your backyard is generally installed with a noticeable slope, neither should your fence. However, this is just personal preference. Yours may be different. Keeping the top of your fence level generally takes a little more installation time and is a little more costly (you need to order the next longer post size up), but the overall effect is more pleasing to the eye.
Stepped Fence Considerations
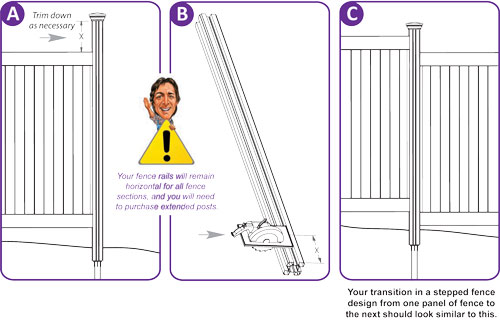
You will need to trim down your posts length (because you’ve ordered extra long posts) either as you install your fence (see illustrations below), or leave them all randomly high and trim at completion. See tips on how to cut vinyl here.
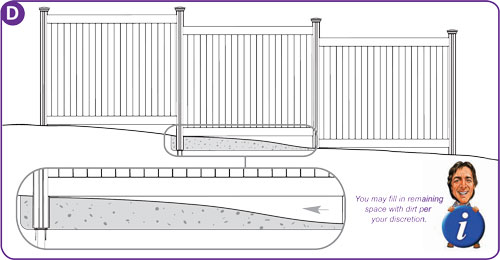
At the higher ground, keep the bottom rail either as close to the ground as possible, or even bury it down a few inches. This will help keep the gap on the bottom rail at the lower ground as minimal as possible. Once your fence is complete, you can “feather in” backfill dirt to minimize the gap between the bottom rail and the ground.
Sloped Fence Considerations
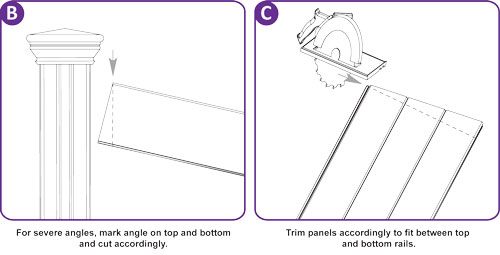
If you choose to go with the slope method, you need to be aware of the following potential conflicts. If your slope is severe (greater than 10 degrees- see how to calculate this here) you will need to angle cut your rails and the top and bottom of your fence boards (on certain styles only) to fit and function properly. Please note that you can only cut so much. There are limitations with steep angles. If you slope is greater than 15 degrees or so, talk to your fence consultant about potential solutions.
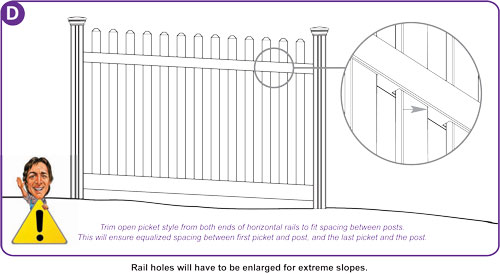
If you use the slope method to install the Jiminy Picket, Plain Jane, or the Nervous Nelly, you may need to enlarge the holes on the bottom of the top fence rail. This will allow your pickets to remain vertical while your rails are sloped. These holes already come enlarged for moderately sloped fence lines. You can use a rat tail file to accomplish this rather quickly.
(To enlarge holes, you can use a small Dremel router. A fine tooth blade jigsaw would also work, and a file would do the job if you only had 1 or 2 panels.)
Note: Gate are not rackable and must be installed on a relatively flat surface.
 by Denise